Thursday, August 8, 2013

Simplicity 4760 Pattern

One of the first things I ever had to sew in fashion school was a shirt. Back then it took me a good few weeks to get it done and to this day I don't even wear it (however my friend Miriam begged me to have it and she actually wears it) and I don't even know how the teacher accepted my attempt at a shirt. By now I have gotten the hang of it and can make in about a few hours.
My brother's closet consists of t-shirts and short sleeved shirts so he asked me to make him one. I had only made one woman's shirt before but it was basically the same steps.
 
This is the pattern I got for him. I ended up making the yellow one in a small size.

at least smile.
This was the first shirt I made him. It came out pretty good for my first try.
So then I made him a second one.

I told my bro he's my new male model. haha.
The second one came out a lot better except it shrunk (you can see it fits tight on the sleeves) and this shirt was originally a light pink. My brother said he wanted to wear a pink shirt but once he tried it on he no longer liked the pink color (he's actually really picky) so I improvised and dyed it this color (this was one of the first garments I ever dyed).
I'm now in the process of making him a denim shirt.


New Look 0165 patterns

I had lots of good amounts of cotton fabric laying around from previous projects so I decided to make some dresses for this summer heat with them.

For this first dress, I used this pretty patterned fabric my friend Grace brought me back from Indonesia.

This second dress reminds me of the tent dresses popular in the 60's. I would actually wear it to a 60's theme party if I wanted to.
 
These tent dresses were the easiest dresses I have ever sewn and I think they are really cute.


Studded trucker hat

My new studs from China arrived two days ago. Of course, I went crazy and studded everything I set my eyes on, including this trucket hat.


Poor hat never stood a chance!

If you're interested in the hat, I have it listed in my shop on Etsy.
:)

Visit my new shop on Etsy

I decided to open my own little shop on Etsy and sell some of the stuff I make or refashion.
If you have a chance, please take a look at it.
I will slowly be adding more stuff on it.
Thanks!

Tuesday, July 30, 2013

DIY studded ombre bleached denim jacket.

For this DIY, I once again used bleach. I used the denim jacket I scored at Buffalo Exchange for $4.50.
You will need: bleach, spray bottle, a hanger, studs, and a denim jacket.
 
 
Hang your jacket outside
Spray the bleach on the lower half of your jacket.
After a few minutes your jacket will start turning colors like this. You can stop here or keep spraying the bleach if you want the ombre to be more obvious.
I kept spraying mine because I wanted the lower half to look white. After you get your desired color, rinse with cold water, put in washing machine (with no detergent), and dryer.
My dad actually liked how it came out. I have ordered some spikes on Ebay to add to the sleeves and collar to make it look more like the 80's style.
 
You may decide to bleach the upper half instead or only one side. I have seen this look on shorts, pants, and vests. I have also seen it with different colors other than bleach so it's all about what look you're going for.

Once you have the bleach decide where you want to add the studs.
This is where I added mine.

I love how it turned out! I'm in love with my new jacket...
 

Sunday, July 21, 2013

DIY Ombre dip dye sweater

The materials you will need for this DIY are: sweater/sweatshirt, bucket, and dye in your fave color.

First you pick the sweater you will be working on. Here is mine!
Second, prepare your work area. This can get a bit messy. I worked in our garage and used a folding chair and a ladder.
Choose the color you wish your ombre to be and prepare the water for it. Once you have the steaming water ready for it already mixed with the dye, carefully carry it to your working area and dip the bottom half of your sweater. Keep the water moving. Leave it to soak for 30 minutes.
Next you need to lower the jacket a little more and leave it soaking for another 15 minutes. Once that is done, rinse with cold water and throw it in the washer with no detergent! Hang it out to dry and....
It should more or less look something like this!

Friday, July 12, 2013

DIY Jewelry Display

For this DIY you will need: cork board, aerosol spray paint, tacks, and jewelry.
 
Get the corkboard of your choice and spray the paint on it. (I chose black to go with the furniture in my room.)  
 
You should probably do it outside so you don't get high with the fumes from the paint.
 
Once it has dried, you can place the tacks on it on the order you want. (I chose see through tacks.)
 
Then proceed to hang your jewelry on it, hang it up on the wall, and you're done!


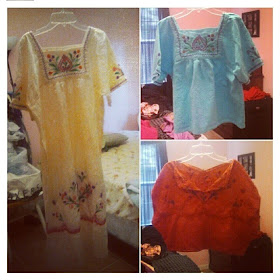
Refashion Mexican Dress

For this refashion I used a Mexican dress I had at home that had never been used. I cut it in half and got two different shirts which I had proceeded to dye different colors.
This was one of my first refashions and the easisest ones.
 

Denim Shirt Refashion

For this refashion I grabbed one of my dad's old denim shirts. It was too big and had a lot of stains around the collar area.
 
I decided to dye it a royal blue and add some colorful fabric to the collar and pocket. I then changed the ugly old buttons to some cute red ones that popped on the shirt.
I wore it like this a few times but then decided to change it up a little bit. I cut it shorter and cut off the sleeves.
 
This was my final product. I think it came out looking really cute.


Monday, July 8, 2013

DIY tie-dye leggings

I had a pair of white leggings that I have only worn once before. I decided to spice them up a little and maybe make actual use of them. I decided to tie-dye them.
I started with a pair of white leggings. (bleh!)
I then proceeded to tie as many rubber bands as I possibly could.
This is the dye that I love to use. (There are many good dyes so just make sure to follow the directions required for your dye.) My dye requires me to use one gallon of steaming water and 1/4 cup of salt.
After I had my leggings soak in a bucket with the dye water for about thirty minutes, I went ahead and rinsed them. I then put them in the dryer machine and they were ready!
This did not look at all like I had envisioned. The reason being that the leggings were made of polyester. Polyester will not take dye as good as cotton will. However, I still think they came out looking pretty sick!


I tried the same method with some gray cotton leggings I had and this is the result.
 
 My second attempt came out completely different!

Thrift Shopping at Buffalo Exchange

Although I have only been to Buffalo Exchange twice, I love that store. I went this Saturday with my friend Angelica and although I was not planning on spending anything in the store, I ended up leaving with 3 items.
 
 
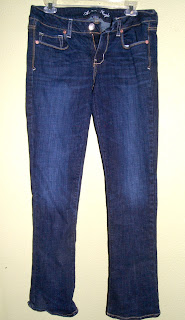
I found a pair of American Eagle jeans for about $13 and they fit me perfectly so I had to get them!


I also found this jean jacket for $4.50! I am still debating on how I want to refashion it. I might do an ombre bleach on it.
 
 
And last, I found this pair of high top sneakers for $22.50.
I love them!

If you have never been to one of these stores before and you love Goodwill and Plato's Closet. It is definetely worth checking out. It is not as expensive as Goodwill and better quality than Goodwill.

DIY tie-dye bleached shirt and skirt

For this DY I decided to tie-dye bleach an old vacation Bible school I found that no one was using. You will need the same items you used for the DIY tie-dye bleached jeans.
 
 
This is the lightweight denim shirt I started with.
 
I tied rubber bands all over it but instead of placing it in a bucket this time I laid it out outside and used bleach in a spray bottle.
I kept checking on it every fifteen minutes and spraying it with bleach and turning it around until I was satisfied with the color. Then I threw it in the washing machine with no detergent and finally the dryer.
This is what I ended with.
I'm still trying to decide if I want to put some accessories on it like studs or chains or just leave it as it is.
 
 
I also had a denim skirt I got from Goodwill. I decided to bleach it as well but to use another method.
This is the original Old Navy skirt I started with.
I then laid out the skirt on the grass and sprayed the bleach at various angles and different spots.
Then I threw it in the washing machine and finally the dryer.
And this is the final product!
 
 
So now you can see how different methods of using the bleach result in different looks. It's all about finding the one you like.

Sunday, July 7, 2013

Half-Shaved or Undercut Hairstyle

I had seen the half-shaved hairstyle two years ago in Mexico when I first fell in love with it. I really wanted to get it but was scared I might not be able to pull it off or even worse, regret it as soon as I had done it.
 
I had told a few friends about it and showed them pictures. Half of them would tell me to go for it while the other half let me know they thought it was hideous. Even my cousins told me I would not be able to pull it off because I had a fat face. So I decided to just look for other hairstyles more suitable for my face.
 
However, although one of my fashion teachers has said the hairstyle is "so 2011" it has actually become quite popular.
 
So this summer I went to Mexico on vacation and told my aunts and cousins I really liked that hairstyle when I saw a girl at a mall with it. Finally my cousin Kenia convinced me to get it and the day before we left Mexico she and I went to the salon and I got the haircut I have been wanting for two years now!
This is the night I first got my new haircut. I had to grow out my bangs!
 
 
Here's how it looks now!
 
My hair grows really fast but I have some barber clippers so it's all good.
 

DIY tie-dye bleached jeans

For this DIY I was inspired by the tie-dye bleached denim everyone seems to be wearing these days. I decided to try this on a pair of jeans I own.
 
For this DIY you will need: a pair of jeans you don't mind bleaching, rubber bands, a bucket, and bleach.

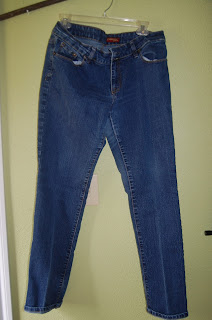
This is the old pair of jeans I started with.
 
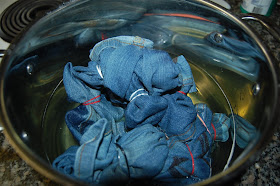
Tie all the rubber bands you want. The more you tie, the darker spots you will have.
I decided to use 2 quarts of bleach and 1 quart of water. The more bleach you use, the sooner your denim will whiten.
 
I left my jeans in there for about thirty minutes before I noticed any change. Overall I left my jeans in the bleach for about an hour and thirty minutes. Again it depends on how bleached you want your denim to look so just keep checking every 20-30 minutes until you are satisfied with the look.
After I was happy with the results I rinsed them with cold water and took out all the rubber bands. I then put them in the washing machine (with no detergent!) and dryer.
I was very happy with the results!